Showing posts with label home. Show all posts

Thursday, 11 December 2014

Upcycled Festive Heart Decorations


Yesterday I made these Scandinavian-inspired heart decorations for our Christmas tree. They're very simple to make, and almost completely upcycled!

The method is so easy it's guessable, so I didn't make a proper tutorial, but here's a quick run down.

I used:
Template (from junk mail)
Fabric (old pillowcase)
Filling (from knackered old pillow)
Embroidery thread (from charity shop)

Using the template, I cut out hearts and sewed them right sides together, leaving a gap for turning.

Then I turned them so the right side of the fabric was facing outwards, and stuffed them with filling.

After sewing up the gap, I threaded a darning needle with 5-6 inch lengths of embroidery thread and pushed it through the top of the hearts, tying the ends in a knot to make a loop.


Here they are on our tree! Also seen here are several homemade items I've posted about in the past:
Recycled Magazine Garland
Tin Can Tea Light Holders
Felt Doves and Peace, Hope & Joy Stars Decorations

Saturday, 15 November 2014

Easiest Christmas Pine Cone Ornaments


Alright, so I haven't updated here for ages, and it's been even longer since I shared a DIY!
So here I am, with a shiny new tutorial for pine cone baubles!

This how to is ridiculously easy and obvious, and there's a no-sew version, yay!


You'll need:
Pine cones
Ribbon
Drawing pins
Needle and thread to match ribbon (skip this if going for the no-sew option)
Fray stopper/clear nailpolish/glue to stop ribbon fraying
Scissors or pinking shears

Wednesday, 25 September 2013

Pinning Inspiration #19

I have a bit of a fondness for pompoms. So that is the theme for this week's Pinning Inspiration. Pompoms!


Wednesday, 18 September 2013

Pinning Inspiration #18

I'm feeling a little dozy as I write this, so for this week's Pinning Inspiration, let's look at bedrooms.


Wednesday, 4 September 2013

Pinning Inspiration #16

For this week's Pinning Inspiration, let us daydream of the perfect reading nook....


A comfortable little place to curl up with a good book!

Wednesday, 21 August 2013

Pinning Inspiration #14

Last week was all about British coolness and included a few items of homeware. This week's Pinning Inspiration focuses on a very specific item of homeware: customised lighting.

There is some very cool stuff around, both for inspiration and for purchase (though some of the purchasable stuff can always be inspiration for a DIY!)


Wednesday, 14 August 2013

Pinning Inspiration #13

For all I might complain about my country sometimes, I'm still pretty proud to be British. We have tea, a damn cool flag and a queen who jumps out of helicopters! (Okay, not quite, but it was still an entertaining performance).

So the theme for this week's Pinning Inspiration is Cool Britannia! All things union jack, cream tea and Her Majesty.


Union Jack room, for those who really love it :)


It might not be a royal throne, but this chair is fit for a queen!


If you feel more like a Cinderella, this Union Jack-printed cooker is perfect (for boiling water for tea in an old-fashioned kettle, of course!)


Union Jacks getting a bit too much for you? Try a bit of Royal Pop Art!


British and Proud? Say it out LOUD with a t-shirt!


Or do it Vivienne Westwood's way, with a Union Jack dress. Equally subtle. ;)


And of course we have the Pearly Kings and Queens, their clothes decorated with buttons.


But let's not forget the morris dancers!


No 'British' post would be complete without this slogan (even if it is hugely overused now). To think that it was never used is amazing--the authorities certainly missed something with this one!


One key part of Britishness, and inspiration for your plate, is a 'Full English Breakfast'. Of course, this includes the tea!


Then there's the cream tea: clotted cream and jam on scones. Whether you go Devonshire (jam on top) or Cornish (cream on top) it always involves...tea!


He's not food, but he's British and popped up when I was searching for a good picture of tea. It made me laugh, so you get some Benedict Cumberbatch being a dork instead. Hurrah!


If the lack of tea in this post has made you feel somewhat cheated, here's the video for Earl Grey by Rizzle Kicks:


Wednesday, 31 July 2013

Pinning Inspiration #11

To continue from this week's Marvellous Monday theme, this week's Pinning Inspiration looks at inventive floral displays!


This one is utterly beautiful, like something from a fantasy tale or faerie glen.

Wednesday, 17 July 2013

Pinning Inspiration #9

This week's Pinning Inspiration takes us right back to where the heart is: the home!
Today's theme is postage style (which is rather coincidental, since the writing of this post was interrupted by the postman!)


The above picture was taken in an (unfortunately short-lived) dumpling bar in Brighton. I totally dig the postage-themed cushion, particularly as it is stamped 'Japan' and the shop sold Japanese-inspired food.
Imagine how cool it would be to recreate this, with an old mail sack as the seat cushion (and yes, the base of the seat is an old suitcase...and yes, the floor is fake grass...that shop was cool, you guys).

Rambling aside, all kinds of postal paraphernalia can be used to create, and used to inspire, all manner of things for the home and for yourself!

Wednesday, 3 July 2013

Pinning Inspiration #7

You're driftwood floating underwater
Breaking into pieces, pieces, pieces
Just driftwood hollow and of no use
Waterfalls will find you, bind you, grind you.
~ Travis, Driftwood
Contrary to Travis' poetic lyrics, we all know that driftwood has lots of uses, and creative ones at that!
So here is this week's Pinning Inspiration, on the very subject.


Driftwood projects don't have to be very involved--they can be as simple as gluing or tying a few smaller pieces around a glass candle holder. (Isn't this one from Anthropologie gorgeous?)

Wednesday, 26 June 2013

Pinning Inspiration #6

Last week’s post was about explorer and adventurer Alexandra David-Neel. Did it leave you feeling inspired to travel?

If like me, you’d love to travel but don’t have the funds to do so, perhaps this week’s Pinning Inspiration will inspire you with ways to bring the exotic into your home!


Sometimes, a few framed posters or photographs will be enough. A cerulean sea, brightly-clothed African women, a Tibetan temple--images from whatever part of the world appeals to you the most. 
Even if pictures aren’t enough, they are a good start!

Wednesday, 12 June 2013

Pinning Inspiration #4

Last week's, Pinning Inspiration focused on statementnecklaces.
This time around I want to share some inspiration that will make you want to roll up your sleeves and reach for the toolkit!

Upcycling is a great way to give a new use to something old, so this post looks at upcycled furniture.
You can upcycle all kinds of things. The only limits are skill, money and most importantly, imagination!


I’m totally in love with these bathtub sofas. Brings a whole new meaning to relaxing in the tub, right?

Tuesday, 29 January 2013

The Warped and Whorly Wood


Whilst on a walk in nearby woods a few months ago, I discovered this fantastic wood!

Towards the end of my favourite route, some trees had been cut back. All the sawn off branches had just been left at the side of the pathway.


That was where I found these lovely pieces! I love how different branches have twisted and grown around and into each other to create unusual shapes.

Of course, it was all covered in dried mud, with the occasional dead bug and some paint.


This wood also had a case of woodworm, so it was banished to our (metal and glass) conservatory until I could deal with it.
Nanny supplied some woodworm treatment and I gave the wood several coats...

...Then left it for a couple of weeks when I got distracted by other things.

Thankfully, Dad found some varnish when he was clearing out the garage, so I was all set to finish the project!
I sanded the wood lightly to remove the paint and smooth up some of the rough bits. (Really, I should have done this right off the bat.) Ended up utterly covered in muck after this!


Each piece of wood got a coat of varnish. It really helped to bring out the colour!
In the picture, you can see the varnished part (top) versus unvarnished (bottom).
Please ignore all the junk in the background :)


Once I’d given the varnish a few days to cure, I was left with these lovely, finished pieces.


As of yet, I haven’t decided on a place for the big piece. The two smaller pieces are propped up on the top of my bookshelf (no picture of this because I haven’t dusted!)


I’m now trying to decide on whether I can turn these into something functional...

Saturday, 1 December 2012

Recycled Magazine Garland

recycled magazine garland

At the charity shop where I volunteer, we were recently discussing a Christmas-themed window display. The manager, Ann, wanted a red and white Scandinavian-inspired theme! I decided to make this red and white garland from old magazines to put in the display.

Friday, 9 November 2012

Punkting


I’m not one for jumping on the bandwagon, but I’ve resisted making bunting for too long!

Of course, I had to give it more of a personal touch. No floral, pastels or chevrons for me, oh no!

Instead, I’ve got punky bunting…punkting?


Bunting seemed like a scrap-busting project, and my scraps supplies consisted of a lot of plaid, vinyl and skull-print! So punk-inspired bunting seemed like the obvious choice.

I was incredibly lazy with making this too...


I cut out the pieces...


...pinned them to some leftover tape/ribbon (I made it one-sided...like I said, lazy!)…


…sewed all the pieces on  and customised with safety pins, fabric paint and eyelets

I cut the fabric out using my rotary cutter. The woven fabrics fray, but (asides from my chronic laziness that day) I felt that using pinking shears or hemming two pieces together would detract from the messy, punky image! 


In the process of making this, I discovered how difficult it is to photograph bunting! Especially when outside – the only ‘big’ space suitable – the weather is wet and windy...

Friday, 7 September 2012

Framed Criss-Cross Noticeboard


For a while now, I’ve admired those cute, pin-free notice boards made with fabric and ribbon. When I gave my bedroom a mini-makeover, I got rid of my cork notice board (which I was previously using for necklaces) in favour of a home-made necklace board!
However, I’ve had an increasing need for somewhere to stick important notes, so sat down to make a notice board using things from my stash.

Sherlock Holmes Museum card and train tickets = utmost importance! ;)

Alright, so I broke my resolution (again) and bought a frame for this project.

But it was £1.50 from a charity shop, so that doesn’t really count, does it?

...maybe it does, but at least the money went to a good cause!

This notice board turned out to be fairly simple to put together, and took about an hour to complete. Here’s a tutorial, with lots of pictures! 

Tuesday, 20 March 2012

Typography Challenge: Home Sweet Home

Since the challenge is now finished, I am finally sharing this at link parties! Voting is open until the end of April on Ricochet and Away

The moment I heard about the Typography Challenge, run by Keren (sew la vie) and Rikka (Ricochet and Away), I signed right up!

The lovely ladies hosted the Naughty Notions Challenge back in January, for which I made a zip-covered clutch bag.

This time around, the goal of the challenge is to create a home décor piece that incorporates typography. 'Great!' I thought, full of ideas.

Then I hit another craft slump and didn’t feel like making anything.

Luckily, some spring weather and a little easy-peasy crafting gave me the boost I needed to crack on with my project!

For this challenge, I decided on wall decor using maps.
Here’s what I put together:

home sweet home canvas

Before starting on this, I was torn between a canvas and a quilted wall hanging. I decided upon a canvas since wall hangings remind me too much of secondary school, where student-sewn squares were quilted together into banners for the stairwells! 

This project cost me a grand total of 99p--and that was the cost of the canvas I bought from The 99p Store.

free motion text canvas

The fabric was an off-cut from my stash and the old map book I used was destined for the recycle bin.

map text canvas

I completed this across a couple of days! Read on to find out about the creation process, and the little lumps and bumps that happened along the way.

free motion map text canvas

Thursday, 16 February 2012

Embroidered Tags

Yesterday I posted about the gorgeous vintage suitcases I now use to store my fabrics. I mentioned that I can’t see through the sides like I could with the plastic boxes I used to keep the fabrics in. Well, here is my solution!


These embroidered tags were made using things from my scraps box :)


I was inspired by these Anthro knockoff Penmanship gift tags, made by Bev at Flamingo Toes:


(I pinned this ages ago, intending to use the idea at Christmas…then was too crafted-out!)

As you can see, mine deviated quite drastically from Bev’s!

Keep reading for the tutorial! :)


Wednesday, 15 February 2012

Vintage Suitcases...part two! Plus a little retro.

After posting about the vintage suitcases that I brought down from the attic, I got completely distracted from posting any more about them!

I wrote previously that the cases smelt musty, and that I didn't want that smell to get onto the fabrics I planned to put inside.
To combat the smell, I spread baking powder inside the bottom of each case. Problem was, Alfie decided he liked the taste of it...

He wasn't very happy that I shut him out of my room after this!

After leaving the baking powder in the cases for a few days, I vaccuumed it out (along with tiny fragments of paint/wood/paper from the previous contents of the cases!) 
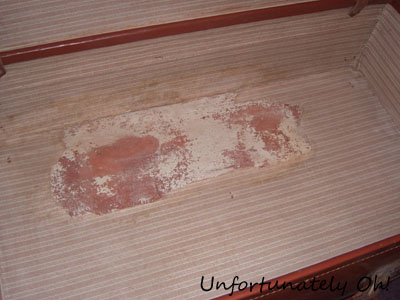
There was a hole in the lining of one case:


I decided to snip off the rough edges, then found that the fabric had come unstuck from the base, so snipped that off...and snipped...until suddenly it looked like this...


Argh!

Of course, I couldn't put my fabrics straight onto that, and I'm too lazy to reline cases at the moment. Drawer liners to the rescue!


I popped some in all the cases to keep them smelling nice. The baking powder had taken the musty smell away, but nice smelling fabrics are more enjoyable to work with! 

In the case with the damaged lining, I also stuck in a little lavender sachet I made before Christmas, to give a little extra scented goodness!:

After all of that, the cases were ready for my fabric stash!

Originally my fabrics were stored in plastic boxes...


Large, easy to see into, quick to get at.
Except the lids of both boxes were broken (my fault for cramming so much in) and the full boxes getting heavier to pull from beneath the bed. 

Also, vintage suitcases look way cooler. 


I separated my fabrics into black & white, red & grey, gold & misc (with linings and interfacing). I have so much black fabric it's bordering on ridiculous. But I guess I'm all set for Halloween?!

These cases went nicely under my bed! 
Within my room I also have these retro lovelies:


The round black vanity case came from the charity shop. I got it cheap because it had some paint splashes on, most of which cleaned off. 
The green cases came from the loft - Dad was going to throw them away because the catches are rusty and the larger one has a little damage! I said 'Noooooo!' and spirited them up to my room, out of harm's way ;) 

As for what's inside...


More fabrics! This is my 'scraps box'!

In the vanity cases...


Fascinators! Mini hats! Mini crowns! Random other things! 
At one point I had a small obsession with making mini hats and mini crowns :)  One one of the mini hats in the picture wasn't made by me (it was made by Primark!)


After all the palaver with baking powder, I now have fabrics in nifty vintage cases. 

True, I can't see inside them now, as I could with the plastic boxes. 

But I have a solution! Come back tomorrow to see what it is :)

Thursday, 9 February 2012

Fake Fur Heart Cushion

Is everyone ready for Valentines Day?
I have another Valentines-worthy craft to share with you today! 


This furry heart cushion was put together in a morning, using leftover fabrics and trim.
I previously used the dark gold fabric for my jewellery display board and also on a skirt--talk about multi-functional! 

 
I chose the colours for my cushion to match my room, but this would look great with different colours and patterns, too!

Here’s an easy tutorial if you want to make your own heart cushion!


You’ll need:
Cushion pad
Fabric for cushion base
Fake fur for heart
Heart template
Trim (enough to go around the heart)
Glue (optional)
Thread to match your fabric(s)

Tools:
Sewing machine/needle and thread
Scissors
Pinking shears (optional)
Ruler
Measuring tape
Marking chalk or pencil


1. Measure your cushion pad and add seam allowance.
Cut two pieces of fabric:
  • 1 x your cushion measurement (e.g. 15”x15”) for the back.
  • 1 x your cushion measurement with half that added on one side (e.g. 15”x22.5”) for the back flap and front. It helps to draw out the original measurement and then add on the extra half-width as it gives you a line to work with in step 2!


2. Fold the back flap over onto the front of the fabric and crease. This will make it easier to attach the heart centrally to the front of the cushion.


3. Draw around your heart template onto the back of the fake fur and cut out.
            Tip: Use small snips of the scissors and cut only through the back of the fur to avoid having lots of loose fibres everywhere!


4. Attach the heart to the centre of the cushion. I took the lazy route and glued it, but hand-stitching is just as good. (The great thing with fake fur is that it doesn’t need hemming!)

If you pick the same option as me, leave the glue to dry before moving to the next step! Don’t get gluey fingers like I did!


5. Pin the trim around the edge of the heart and sew. To avoid sewing through the fake fur, brush the fibres back with your fingertips as you go.


6. Hem the end of the back flap and one edge of the back piece of fabric, for the opening. I didn’t hem the back piece on mine because I used the edge of the fabric, which had already been finished.


7. Right side facing up, fold the back flap down over the front of the cushion. Lay the back piece of fabric (hemmed edge at the top, overlapping the back flap) over the top.


8. Pin the bottom and sides, then sew. Since my fabric frays a lot, I used pinking shears to finish off the seams!


9. Turn the cushion cover the right way, using a pencil to turn the corners. You should have a neat little envelope opening at the back. Stuff in your cushion pad, and you’re done!


10. Enjoy alone, or with cushiony friends :)

Will be linking up to the fabulous parties at the bottom of the page!
Will also link up at this brand spanking new linky party for tutorials!
A Law Student's Journey
Related Posts Plugin for WordPress, Blogger...